
A well-maintained deck can significantly enhance the appearance and value of your home. However, decks are exposed to weather elements that can lead to wear and tear over time. Regular deck painting not only improves the aesthetics but also extends its life by protecting it from moisture, UV rays, and pests. In this guide, we’ll explore the steps, benefits, and best practices for deck painting in Denver CO to help you achieve professional-looking results.
Why Deck Painting is Important
Deck painting is more than just a cosmetic touch-up. It plays a vital role in preserving the deck’s structural integrity. Exposure to rain, snow, and sunlight can cause the wood to warp, crack, or rot. Painting creates a protective barrier that shields the wood from these elements, preventing moisture from seeping in and damaging the material.
Key Benefits of Deck Painting:
Protects against moisture and UV damage
Enhances curb appeal
Prolongs deck life
Makes cleaning easier
Preparing the Deck for Painting
Proper preparation is the foundation of a successful deck painting project. Skipping this step can result in peeling or uneven paint. Begin by inspecting the deck for any loose boards, nails, or screws that need to be tightened or replaced. Next, thoroughly clean the deck to remove dirt, grime, mold, and mildew.
Steps to Prepare the Deck:
Remove any furniture or objects from the deck.
Sweep to clear away debris.
Use a deck cleaner to eliminate mold, mildew, and dirt.
Rinse the deck with a hose or pressure washer.
Allow the deck to dry completely.
Choosing the Right Paint for Your Deck
Selecting the right paint is crucial for durability and appearance. Deck paint is available in a variety of finishes and colors, so you can choose one that complements your outdoor space. There are two main types of paint to consider:
Types of Deck Paint:
Water-based Paint: Dries faster, easier to clean up, and environmentally friendly.
Oil-based Paint: More durable and resistant to harsh weather conditions.
Additionally, look for paint that is specifically designed for outdoor use and offers protection against UV rays and water.
Applying Primer for a Longer-Lasting Finish
Before applying the paint, it’s important to use a primer, especially if your deck is made of untreated or bare wood. Primer helps the paint adhere better and provides an extra layer of protection. It also ensures that the final coat of paint looks even and smooth.
Steps to Apply Primer:
Stir the primer thoroughly before application.
Use a roller or brush to apply an even coat of primer.
Allow the primer to dry as per the manufacturer’s instructions.
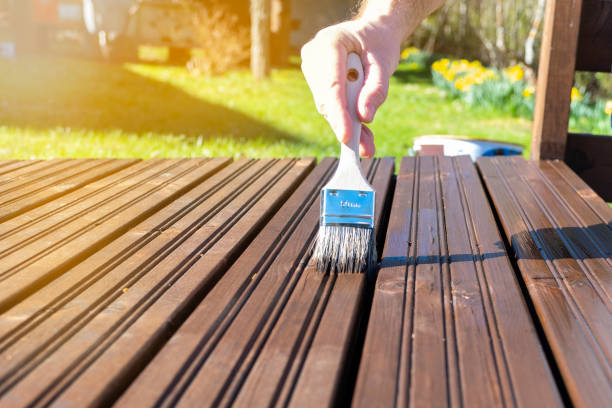
Painting Your Deck: Step-by-Step Guide
Now that your deck is primed and ready, it’s time to paint. The key to achieving a smooth, long-lasting finish is patience and even application.
Steps for Painting Your Deck:
Start by painting the railings, balusters, and edges with a brush.
Use a roller for larger surfaces like the deck floor.
Apply thin, even coats to avoid drips and uneven texture.
Allow the first coat to dry completely before applying a second coat.
Two coats of paint are typically recommended for the best results.
Drying and Curing Time
Once you’ve applied the paint, it’s important to let it dry and cure properly. While the surface may feel dry after a few hours, it may take several days for the paint to fully cure. During this time, avoid placing heavy objects or furniture on the deck.
Drying and Curing Tips:
Check the weather forecast and choose a dry, mild day for painting.
Allow at least 24-48 hours for the paint to dry before walking on it.
Full curing can take up to a week, so be patient before heavy use.
Maintaining Your Painted Deck
A freshly painted deck requires regular maintenance to keep it looking great for years to come. This involves routine cleaning, inspecting for signs of wear, and touch-up painting as needed.
Maintenance Tips:
Sweep the deck regularly to prevent debris buildup.
Clean the deck with mild soap and water every few months.
Repaint or touch up any areas that show signs of wear.
Common Mistakes to Avoid When Painting a Deck
While deck painting is a relatively simple task, there are common mistakes that can lead to poor results. By being aware of these pitfalls, you can ensure a professional-looking finish.
Common Mistakes to Avoid:
Painting in extreme weather conditions (too hot or cold)
Skipping the cleaning and priming steps
Applying thick coats of paint that can lead to drips
Not allowing enough time for the paint to dry between coats
DIY vs. Professional Deck Painting
Painting your deck can be a rewarding DIY project if you have the time and tools. However, for larger decks or if you’re unsure about the process, hiring a professional can save you time and effort.
Pros of DIY Deck Painting:
Cost-effective
Personal satisfaction from completing the project
Full control over the process
Pros of Professional Deck Painting:
Expertise and experience
Proper tools and materials
Saves time and ensures long-lasting results
FAQs
Q1: How often should I repaint my deck?
Depending on the weather conditions and the type of paint used, you should repaint your deck every 2-4 years.
Q2: Can I paint over an old deck without stripping it?
Yes, you can paint over an old deck as long as the surface is clean, dry, and free of peeling paint. If the old paint is in poor condition, stripping may be necessary.
Q3: What’s the best time of year to paint a deck?
The best time to paint a deck is during dry, mild weather. Spring and early fall are ideal as temperatures are not too hot or cold.
Q4: Can I use a paint sprayer for deck painting?
Yes, a paint sprayer can be used, especially for large decks. However, it requires skill to avoid overspray and ensure even coverage.
Q5: What’s the difference between deck paint and deck stain?
Deck paint creates a solid, opaque finish, while stain penetrates the wood, offering a more natural look with the grain still visible.
Summary
Best deck painting is an excellent way to refresh your outdoor space while protecting your deck from the elements. Whether you tackle it as a DIY project or hire a professional, following these steps will ensure a stunning and durable finish that lasts for years.